December, 2025 - FlexRock Coatings

Professional Additives for Roof & Floor Coatings

Modern roof and floor coating systems are engineered for performance — but professional additives take that performance to the next level. Whether the goal is improved slip resistance, increased wear durability, or enhanced system lifespan, the right additive can dramatically improve coating results.

This guide explains the most commonly used professional additives for roof and floor coatings, how they work, and when to use each for maximum effectiveness.

What Are Coating Additives?

Coating additives are specialty materials mixed into or broadcast onto coatings to modify surface characteristics without compromising the coating’s core performance.

Primary Purposes of Additives

✔ Improve slip resistance
✔ Increase abrasion and wear resistance
✔ Enhance safety in traffic areas
✔ Extend coating lifespan
✔ Customize surface texture and grip

Professional additives are used in both roof coating systems and flooring systems, especially in high-traffic or safety-critical environments.

1. Aluminum Oxide Aggregate – High-Performance Additive

Aluminum Oxide is one of the hardest and most durable additives available for coating systems.

Key Benefits

✔ Exceptional abrasion resistance
✔ Long-term durability
✔ Excellent traction
✔ Maintains performance in wet conditions

Best Applications
  • Roof walkways

  • Industrial floors

  • Mechanical access zones

  • High-traffic commercial areas

This additive is ideal where maximum wear resistance is required.

2. Silica Quartz Sand – Textured Aggregate

Silica Quartz Sand is a cost-effective, widely used additive for improving traction and texture.

Key Benefits

✔ Uniform surface texture
✔ Improved slip resistance
✔ Compatible with most coating systems
✔ Easy to broadcast or blend

Common Uses
  • Walkway coatings

  • Sloped roof areas

  • Decorative and functional floor coatings

  • Maintenance access paths

Silica sand is often selected when moderate traction and consistent texture are desired.

3. Tabular Aluminum Additive – High Wear Resistance

Tabular Aluminum offers excellent hardness with uniform particle structure, making it ideal for demanding environments.

Why Choose Tabular Aluminum

✔ High resistance to abrasion and impact
✔ Consistent texture control
✔ Superior durability over time

Ideal For
  • Industrial flooring systems

  • Commercial roof traffic zones

  • Equipment and service areas

4. Decorative Flakes for Flooring Systems

Decorative flakes provide both aesthetic appeal and functional benefits for floor coating systems.

Key Advantages

✔ Improved traction
✔ Enhanced appearance
✔ Hides surface imperfections
✔ Customizable color blends

Common Applications
  • Epoxy flooring systems

  • Polyaspartic floor coatings

  • Commercial interiors

  • Showrooms and garages

Decorative flakes are broadcast into base coats and sealed with a clear topcoat.

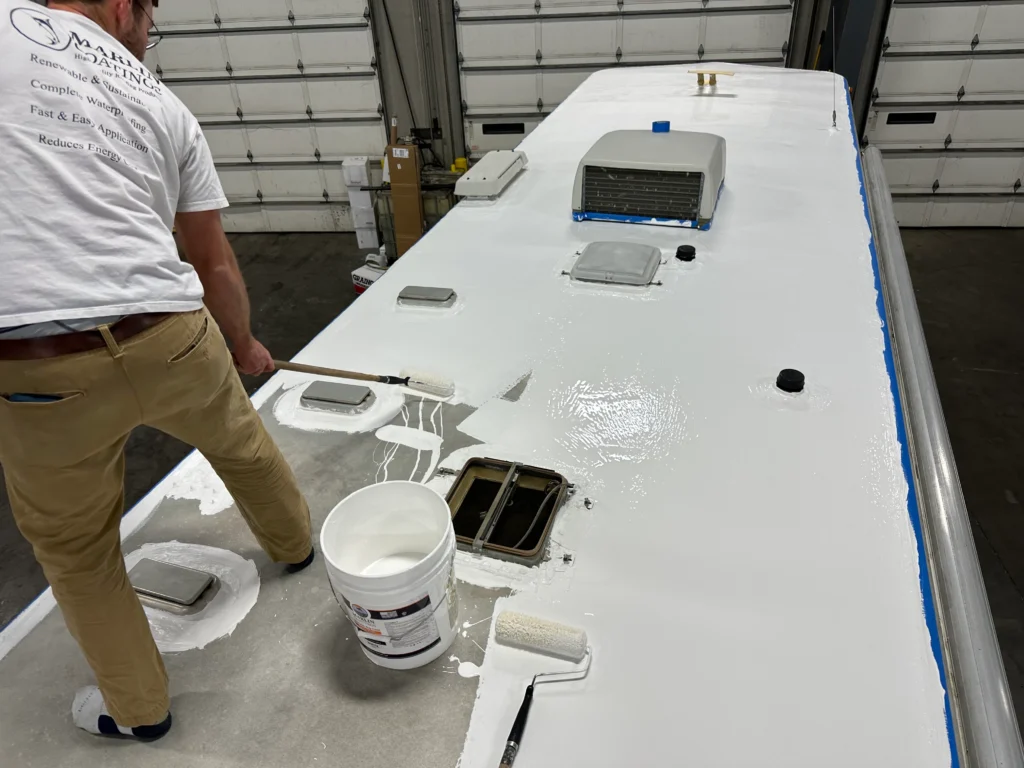
5. How Additives Improve Roof Coating Systems

In roofing applications, additives are critical for safety and longevity.

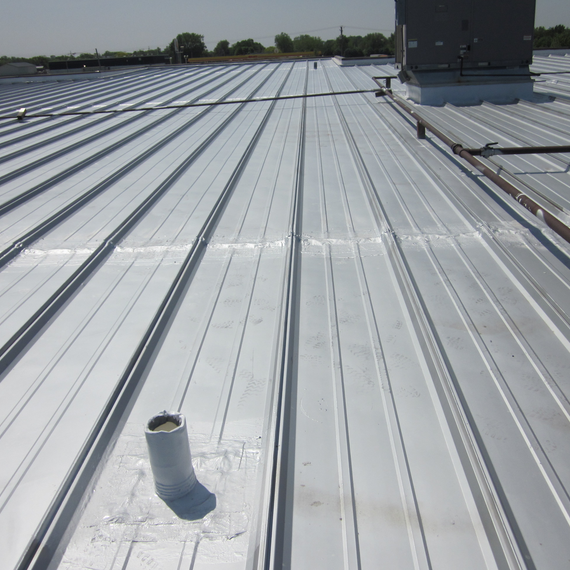
Roof-Specific Benefits
  • Creates defined walk paths

  • Reduces slip hazards

  • Protects coating from foot traffic

  • Extends roof service life

Additives are commonly used with urethane, silicone, acrylic, and epoxy roof coatings.

6. How Additives Enhance Floor Coating Performance

For flooring systems, additives improve both function and aesthetics.

Floor-Specific Benefits
  • Improved slip resistance

  • Increased abrasion resistance

  • Better wear performance

  • Custom surface finishes

Additives integrate seamlessly with epoxy flooring topcoats and polyaspartic flooring coatings.

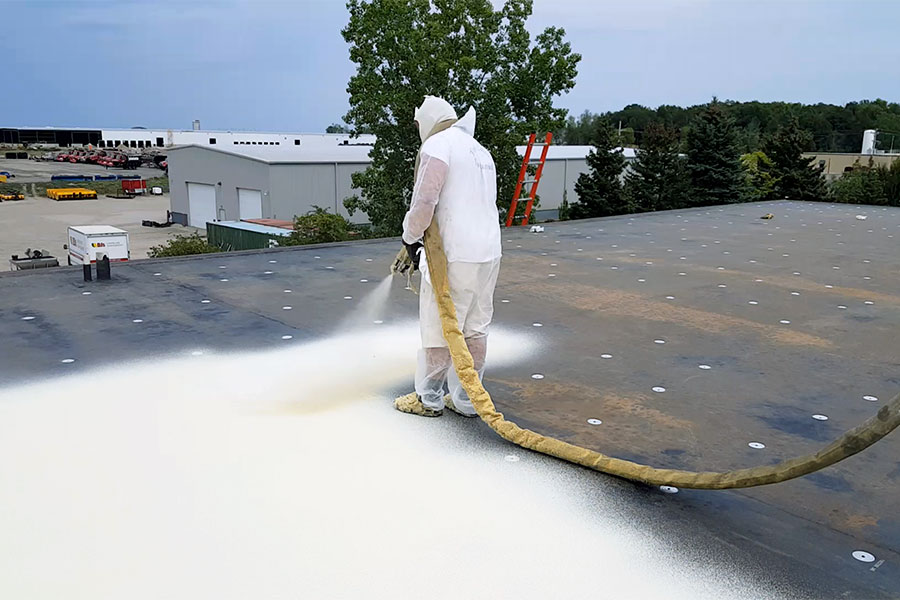
7. Methods of Using Coating Additives

Professional installers use additives in two main ways:

Broadcast Method
  • Aggregate is spread over wet coating

  • Excess is removed after curing

  • Creates aggressive texture

Mixed-In Method
  • Additive blended directly into coating

  • Produces uniform texture

  • Easier application for large areas

Choosing the right method depends on traffic levels and safety requirements.

8. Flex Rock Coatings – Professional Additive Solutions

Flex Rock Coatings supplies high-quality additives designed to work seamlessly with their roof and floor coating systems.

Available Additives
  • Aluminum Oxide Aggregate – High-Performance Additive

  • Silica Quartz Sand – Textured Aggregate

  • Tabular Aluminum Additive – High Wear Resistance

  • Decorative Flakes for Flooring Systems

Each additive is engineered for reliable performance, safety, and long-term durability.

Final Thoughts

Professional additives play a critical role in maximizing the performance of roof and floor coating systems. When used correctly, they:

✔ Improve safety
✔ Increase durability
✔ Extend system lifespan
✔ Reduce maintenance costs

For contractors and facility managers seeking dependable, long-lasting coating solutions, professional additives are not optional — they are essential.

Essential Tools for Roof Coating Pros (Spiked Shoes, Aggregates & More)

Successful roof coating projects depend on more than just high-quality coatings. Professional installers know that the right tools and accessories directly impact application quality, safety, durability, and overall project efficiency.

From spiked shoes that allow safe movement on wet coatings to specialty aggregates that improve traction and wear resistance, this guide outlines the essential tools every roof coating professional should have on the job.

1. Spiked Shoes for Roof Coating

Spiked shoes are a must-have tool for professionals applying roof coatings, especially on large commercial roofs.

Why Spiked Shoes Matter

✔ Allow walking on wet coatings without leaving marks
✔ Improve safety on slippery surfaces
✔ Enable even application without stopping work
✔ Increase productivity on large roofs

Best Use Cases
  • Silicone roof coatings

  • Urethane roof systems

  • Acrylic roof coatings

  • Large flat or low-slope roofs

Spiked shoes are essential when applying coatings that require continuous movement to maintain uniform mil thickness.

2. Aluminum Oxide Aggregate – High-Performance Additive

Aluminum Oxide Aggregate is a premium additive used to improve wear resistance and surface durability.

Key Benefits

✔ Extremely hard & abrasion-resistant
✔ Enhances traction on walkways
✔ Ideal for high-traffic roof areas
✔ Improves coating longevity

Where It’s Used
  • Roof walk paths

  • Maintenance access zones

  • Mechanical equipment areas

  • Industrial roofs

This aggregate is ideal when maximum durability is required.

3. Silica Quartz Sand – Textured Aggregate for Coatings

Silica Quartz Sand is commonly used to create texture and slip resistance in roof coatings.

Key Benefits

✔ Improves slip resistance
✔ Creates uniform texture
✔ Cost-effective solution
✔ Compatible with acrylic, urethane & epoxy coatings

Common Applications
  • Walkway coatings

  • Sloped roofs

  • Maintenance paths

  • Safety zones

Silica sand is often broadcast into wet coatings and back-rolled for consistent coverage.

4. Tabular Aluminum Additive – High Wear Resistance

Tabular Aluminum is a specialty aggregate known for its superior wear resistance and consistent particle size.

Why Pros Choose Tabular Aluminum

✔ Excellent durability
✔ Consistent texture
✔ High resistance to impact and abrasion
✔ Ideal for industrial environments

Best For
  • Heavy foot traffic areas

  • Rooftop equipment zones

  • Commercial & industrial roofing systems

5. Walkway Coating Systems

Walkway coating systems are designed to protect roof surfaces from repeated foot traffic.

System Components
  • Base coat (urethane or epoxy)

  • Broadcast aggregate (silica, aluminum oxide, or tabular aluminum)

  • Topcoat for sealing & UV protection

Benefits

✔ Improved safety
✔ Reduced surface wear
✔ Longer roof life
✔ Defined walking paths for maintenance crews

6. Application Tools Every Pro Needs

In addition to specialty accessories, these basic tools are critical for professional results:

Essential Application Tools

✔ Rollers (½”–1¼” nap)
✔ Brushes (detail work & flashing)
✔ Squeegees for spreading coatings
✔ Mixing paddles & drills
✔ Measuring tools for mil thickness
✔ Buckets & pour spouts

Using the right tool ensures uniform coverage and prevents coating failures.

7. Safety Equipment (Non-Negotiable)

Roof coating projects involve solvents, chemicals, and slippery surfaces.

Must-Have Safety Gear

✔ Gloves (chemical resistant)
✔ Safety goggles
✔ Respirators (when required)
✔ Harnesses & fall protection
✔ Non-slip footwear (besides spiked shoes)

Professional crews never compromise on safety.

8. How Aggregates Improve Roof Coating Performance

Adding aggregates to roof coatings delivers measurable performance benefits:

  • Increased slip resistance

  • Improved abrasion resistance

  • Extended coating lifespan

  • Enhanced safety for maintenance crews

Aggregates can be broadcast into wet coatings or mixed directly depending on system design.

9. Why Flex Rock Coatings Tools & Additives Stand Out

Flex Rock Coatings offers professional-grade tools and additives designed to integrate seamlessly with their roof coating systems.

Available Products Include
  • Spiked Shoes for Roof Coating

  • Aluminum Oxide Aggregate – High-Performance Additive

  • Silica Quartz Sand – Textured Aggregate

  • Tabular Aluminum Additive – High Wear Resistance

  • Walkway Coating Systems

Each product is engineered for durability, safety, and professional-level performance.

Final Takeaway

Professional roof coating results depend on more than just the coating itself.
Using the correct tools, aggregates, and safety equipment ensures:

✔ Even application
✔ Increased safety
✔ Longer coating lifespan
✔ Reduced callbacks
✔ Higher customer satisfaction

For contractors who want reliable, high-quality outcomes, investing in the right roof coating tools is essential.

Silicone Roof Coatings vs High Solids Silicone – Detailed Breakdown

Protecting an RV roof is one of the smartest investments any RV owner can make. A well-maintained roof prevents leaks, heat damage, water penetration, UV degradation, and costly structural repairs. RV Roof Coating Kits make this process easier by bundling everything needed for a complete restoration—primer, sealants, seam tape, and the topcoat.

But with several options available, choosing the right kit can feel overwhelming. This guide breaks down the three most common systems:

Budget Kits
Standard Kits
Premium Kits

Each kit offers different performance levels, lifespans, and cost ranges—perfect for beginners, travelers, or full-time RV users.

Why RV Roof Coating Kits Are Essential

RV roofs face unique challenges:

  • Constant movement and vibration

  • UV exposure on long trips

  • Temperature swings across climate zones

  • Rain, snow, hail, and high winds

  • Aging rubber membranes (EPDM/TPO)

  • Seam failures around vents, AC units & skylights

A roof coating kit extends the roof life while ensuring:
✔ Long-term waterproofing
✔ Cooler interior temperatures
✔ Better energy efficiency
✔ Reduced maintenance costs
✔ Protection from cracking and leaks

1. Budget RV Roof Coating Kit

Affordable protection for older RVs & short-term use

Budget kits provide basic waterproofing and reflectivity—ideal for light-duty applications or owners needing a quick refresh.

What’s Included
  • Acrylic or elastomeric coating

  • Basic roof cleaner or primer

  • Patch or seam caulking

  • Roller & brush tools

Best For

✔ Weekend RV users
✔ Older roofs nearing replacement
✔ RVs stored outdoors but lightly used
✔ Budget-friendly maintenance

Advantages
  • Low cost

  • Easy DIY application

  • Good UV reflectivity

Limitations
  • Shorter lifespan

  • Not designed for ponding water

  • Requires more frequent recoating

2. Standard RV Roof Coating Kit

Balanced performance & durability — ideal for most RV owners

Standard kits are the most popular because they offer strong adhesion, good weather resistance, and a longer lifespan.

What’s Included

  • High-grade acrylic or urethane coating

  • EPDM/TPO/metal-compatible primer

  • Seam tape or polyester fabric

  • High-quality caulking

  • Application tools

Best For

✔ Cross-country travelers
✔ 5–10 year-old RV roofs
✔ RVs exposed to sun and rain
✔ Users seeking durability without premium pricing

Advantages

  • Strong adhesion to membranes

  • Better resistance to UV & temperature swings

  • Good waterproofing

  • Medium-to-long lifespan

Limitations

  • Requires proper prep

  • Not suitable for extreme ponding water areas

3. Premium RV Roof Coating Kit

Maximum protection, lifespan & weather resistance

Premium kits use high-performance formulations such as high-solids silicone, urethane, or hybrid systems. These coatings deliver the strongest waterproofing and UV protection.

What’s Included
  • High-solids silicone/urethane topcoat

  • Advanced EPDM/TPO/fiberglass primer

  • Industrial-grade seam tape

  • Long-lasting sealants

  • Professional-grade tools

Best For

✔ Full-time RV travelers
✔ Harsh climates (coastal, desert, heavy rain)
✔ New or well-maintained RV roofs
✔ Long-term ownership

Advantages
  • Superior waterproofing

  • Withstands ponding water

  • Exceptional UV and heat resistance

  • Longest system lifespan (up to 10+ years)

Limitations
  • Higher cost

  • Requires careful installation

  • Needs clean, prepped surfaces for full performance

Which RV Roof Coating Kit Should You Choose?

✔ Choose Budget If:

  • Your RV is old or lightly used

  • You only need short-term protection

  • You want a simple, affordable solution

✔ Choose Standard If:

  • You’re a regular RV traveler

  • Your roof has moderate aging

  • You want long-term reliability without overspending

✔ Choose Premium If:

  • You travel full-time or in extreme climates

  • You want the longest lifespan & best protection

  • Your RV roof is new or in good condition

Why Choose Flex Rock Coatings RV Kits?

Flex Rock Coatings provides Budget, Standard & Premium RV Roof Coating Kits engineered specifically for EPDM, TPO, fiberglass, and metal RV roofs.

Benefits:
  • High-adhesion primers

  • Seamless waterproofing

  • Superior UV resistance

  • Durable topcoats for long-term performance

  • Easy-to-follow kits for both DIYers and professionals

Whether your customer wants a quick fix or a long-term roofing upgrade, Flex Rock Coatings has a perfect system ready to go.

Final Takeaway

Choosing the right RV roof coating kit depends on:

  • Your RV’s age

  • Your travel frequency

  • The climate you drive and store in

  • Your budget and long-term plans

With the right kit, RV owners can prevent leaks, extend roof lifespan, and enjoy a safer, cooler, and more durable travel experience.

RV Roof Coating Kits – Budget, Standard & Premium Systems

Protecting an RV roof is essential for preventing leaks, sun damage, and costly repairs. Whether you own an EPDM, TPO, fiberglass, or metal RV roof, using the right RV Roof Coating Kit can extend the life of your RV and improve energy efficiency during travel.

To make the buying decision easier, this guide breaks down the three main types of RV roof coating systems:
Budget
Standard
Premium

Each tier offers different levels of durability, coverage, and UV protection — and each is suited for a specific type of RV owner or condition.

Why RV Roof Coating Kits Matter

Over time, RV roofs face:

  • UV degradation

  • Ponding water

  • Cracking & seam failures

  • Heat expansion & movement

  • Dirt buildup

  • Long-distance weather exposure

A complete coating kit restores waterproofing, strengthens seams, and prevents expensive roof replacements — especially when using high-quality systems like those from Flex Rock Coatings.

1. Budget RV Roof Coating Kit

Affordable protection for older RVs, short-term needs, or DIY users

Budget roof coating kits provide basic waterproofing and UV reflectivity. They are perfect for light-duty use or for RV owners who want a quick fix without investing in a long-term restoration.

What’s Typically Included
  • Acrylic or elastomeric roof coating

  • Basic primer (if needed)

  • Seam caulking or patch material

  • Rollers & application tools

Best For

✔ Older RVs near end-of-life
✔ Seasonal or occasional RV users
✔ Light climates (not extreme heat or rain)
✔ Quick, economical roof refresh

Pros
  • Low cost

  • Easy application

  • Good UV protection

Cons
  • Shorter lifespan

  • Not ideal for heavy rain or long-term durability

  • Requires more frequent re-coating

2. Standard RV Roof Coating Kit

Balanced protection, durability & affordability — the most popular choice

Standard kits provide stronger adhesion, better waterproofing, and longer-lasting protection. These systems often include urethane or high-grade acrylic coatings, offering a solid mid-tier solution.

What’s Typically Included
  • High-quality acrylic or urethane roof coating

  • RV roof primer (EPDM/TPO/metal compatible)

  • Seam tape or fabric reinforcement

  • Sealant for vents, joints & edges

  • Application tools

Best For

✔ Regular RV travelers
✔ RVs exposed to sun, rain & temperature swings
✔ Medium-age roofs needing restoration
✔ Users wanting balance between cost & performance

Pros
  • Strong weather resistance

  • Better adhesion to EPDM, TPO, fiberglass & metal

  • Longer lifespan than budget kits

Cons
  • Slightly higher price

  • Requires proper cleaning & prep

3. Premium RV Roof Coating Kit

Maximum durability, UV protection & waterproofing for long-term performance

Premium systems often use silicone, urethane, or hybrid technologies engineered for extreme conditions. They offer the strongest protection against ponding water, UV rays, and long-distance travel wear.

For RV enthusiasts who want the best possible roof system, the premium kit is the top choice.

What’s Typically Included
  • High-solids silicone, urethane, or polyaspartic topcoat

  • Specialized RV primer (EPDM, TPO, fiberglass, aluminum, etc.)

  • Heavy-duty seam reinforcement tape

  • High-performance sealants & accessories

  • Tools for professional-grade application

Best For

✔ Full-time RV travelers
✔ RVs parked in hot or coastal climates
✔ New or well-maintained RV roofs
✔ Long-term owners seeking maximum lifespan

Pros
  • Exceptional UV resistance

  • Best waterproofing

  • Withstands ponding water

  • 2–3× longer lifespan than budget kits

Cons
  • Higher upfront cost

  • Requires more prep and careful installation

Which RV Roof Kit Should You Choose?

Choose a Budget Kit If:

  • You need a temporary or low-cost fix

  • Your RV is older or lightly used

  • You’re doing a quick DIY project

Choose a Standard Kit If:

  • You travel regularly

  • You want good durability without the premium price

  • Your roof has moderate wear or weather exposure

Choose a Premium Kit If:

  • You want maximum protection

  • You own a newer or high-value RV

  • You’re traveling long distances or storing your RV in harsh environments

Why Flex Rock Coatings RV Roof Kits Stand Out

Flex Rock Coatings provides Budget, Standard, and Premium RV Roof Coating Kits engineered for longevity and professional-grade performance.
Benefits include:

  • High adhesion to EPDM, TPO, metal & fiberglass

  • UV-resistant and waterproof formulas

  • Seam tape & sealants included for a complete system

  • Compatible with rooftop accessories (vents, AC units, solar mounts)

Whether you’re looking for a quick refresh or a long-term roof restoration, Flex Rock Coatings has a kit optimized for your RV needs.

Final Thoughts

Protecting your RV roof is one of the smartest investments you can make. Choosing the right coating kit ensures:

  • Leak-free performance

  • Longer roof life

  • Better insulation & energy efficiency

  • Lower maintenance costs

No matter your budget or RV condition, there’s a coating kit that fits your needs — and Flex Rock Coatings offers a complete solution for every level.

Spray Foam Roof Primer – When and Why to Use It

Spray polyurethane foam (SPF) roofing systems provide outstanding insulation and seamless waterproofing — but only when the surface is properly prepared. Spray Foam Roof Primer is one of the most important steps before applying foam or topcoat. It improves adhesion, stabilizes the substrate, and ensures that the SPF system bonds correctly with the roof surface.

This guide explains when to use a spray foam primer, why it is necessary, and how it boosts long-term roof performance.

What Is a Spray Foam Roof Primer?

A Spray Foam Roof Primer is a specialty coating formulated to enhance the adhesion of SPF roofing to a wide range of substrates such as metal, concrete, BUR, modified bitumen, and aged coatings. It creates a uniform, receptive surface so the foam can be applied safely and securely.

Key Functions
  • ✔ Bonds SPF to the substrate

  • ✔ Seals dust, micro-porosity & loose surface particles

  • ✔ Increases foam adhesion strength

  • ✔ Reduces the risk of delamination

  • ✔ Improves long-term system performance

When Do You Need a Spray Foam Roof Primer?

1. When the Roof Surface Is Aged or Weathered

Old roofs often have chalking, micro-cracks, dust, or oxidized surfaces. A primer locks these in and creates a strong foundation for foam adhesion.

Use a primer if:
  • The roof has oxidation

  • The surface is visibly powdery or chalky

  • Previous coatings are aging


2. When Installing SPF Over Metal Roofs

Metal expands and contracts. A spray foam primer stabilizes the surface and improves foam grip even in thermal movement zones.

Use a primer on metal when:
  • Rust has been treated but needs reinforcement

  • Panels are weatherworn

  • Adhesion may be inconsistent without a primer


3. When Applying Foam Over Modified Bitumen or BUR

These substrates often contain oils or granules that reduce adhesion. Primers help penetrate and seal these layers, creating a uniform bonding surface.

Especially important for:
  • Granulated cap sheets

  • Asphaltic substrates

  • Torch-down and APP/SBS modified roofs


4. When the Surface Has Moisture Concerns

Some spray foam primers are formulated to be moisture-tolerant, allowing adhesion even on surfaces that cannot be perfectly dried.

Recommended for:
  • Early-morning dew conditions

  • Humid climates

  • Concrete or porous surfaces holding light moisture


5. Before Applying High-Performance Topcoats

If SPF will be coated with urethane, acrylic, silicone, or polyaspartic coatings, the primer ensures better inter-coat adhesion and extends the system’s lifespan.

Why Use a Spray Foam Roof Primer?

1. Stronger Adhesion

Primers increase the bonding strength between SPF and the substrate — a critical factor in system durability.

2. Prevents Foam Blistering & Delamination

Unprimed roofs may cause foam to separate over time. Primer ensures consistent absorption and mechanical bonding.

3. Creates a Uniform Surface

Seals gaps, dust, micropores, and minor surface inconsistencies, allowing the foam to expand and adhere evenly.

4. Enhances Roof Lifespan

A properly primed surface reduces the risk of premature failures, moisture intrusion, and coating breakdown.

5. Extends Warranty Eligibility

Most manufacturers and specifications require a primer for SPF systems to qualify for long-term warranties.

Where Spray Foam Roof Primers Work Best

✔ Metal Roofs
✔ Modified Bitumen
✔ Built-Up Roofing (BUR)
✔ Concrete Roof Decks
✔ Aged Sprayed Polyurethane Foam (recoat projects)
✔ EPDM or TPO (when allowed — check manufacturer)
✔ Wood & plywood decking

Flex Rock Coatings’ Spray Foam Roof Primer is engineered to maximize adhesion across all these surfaces.

How to Use Spray Foam Roof Primer (Quick Procedure)

  • Clean the roof surface
    Remove debris, dust, grease, and loose granules.

  • Repair major defects
    Fix seams, blisters, and penetrations.

  • Apply primer by roller or spray
    Follow coverage rate guidelines and ensure even application.

  • Allow proper curing time
    Most primers dry within 30–60 minutes depending on temperature.

  • Install SPF foam within recoat window
    Apply foam promptly to avoid contaminants or dust settling.

Final Recommendation

A Spray Foam Roof Primer is essential when installing SPF roofing in most professional scenarios. Whether you’re working on metal, asphalt, concrete, or an aged surface, the primer ensures:

  • Strong adhesion

  • Long-lasting protection

  • Reduced installation failure

  • Compatibility with high-performance topcoats

For contractors who want consistent, long-term results, using the correct spray foam primer is not optional—it’s a best practice.

Metal Roof Primer Comparison: Alkyd vs Epoxy

Which Primer Delivers Better Adhesion, Durability & Corrosion Protection?

Metal roofs require strong, reliable primers to ensure long-term coating performance. Two of the most widely used options in the industry are Alkyd Metal Primers and Epoxy Metal Primers. Both offer solid benefits—but they are designed for different conditions, substrates, and levels of performance.

This guide breaks down the differences to help contractors, facility owners, and roofing professionals choose the right primer for every project.

What Is an Alkyd Metal Primer?

An Alkyd Metal Primer is an oil-based primer formulated for ferrous and non-ferrous metal surfaces. It is commonly used on commercial and residential metal roofs because it is affordable, easy to apply, and provides good general protection.

Key Benefits

  • Excellent rust inhibition

  • Penetrates and seals metal surfaces

  • User-friendly application (brush, roller, or spray)

  • Cost-effective for large metal roofs

  • Flexible enough for roof expansion/contraction

Best For

  • Light-to-moderate corrosion

  • Pre-painted metal panels

  • Budget-oriented maintenance jobs

  • Residential metal roofs

  • Areas with mild weather exposure

What Is an Epoxy Metal Primer?

An Epoxy Primer for Metal is a two-component, high-performance primer used where maximum adhesion, moisture resistance, and corrosion defense are required. It’s the professional choice for industrial metal roofs and high-stress locations.

Key Benefits

  • Superior adhesion to aged metal, galvanized steel, and rusted surfaces

  • Exceptional corrosion and chemical resistance

  • High-build protective film

  • Moisture-tolerant application

  • Ideal base for high-performance coatings (including polyaspartic & epoxy systems)

Best For

  • Industrial metal roofs

  • Coastal or marine environments

  • Heavy corrosion

  • Chemical exposure

  • Prepping metal for premium roof coating systems

Alkyd vs Epoxy: Side-by-Side Comparison

FeatureAlkyd Metal PrimerEpoxy Metal Primer
AdhesionGoodExcellent
Corrosion ResistanceModerateHigh
Chemical ResistanceLowHigh
DurabilityGood for mild climatesLong-term, industrial-grade
CostAffordablePremium
FlexibilityGoodModerate
Cure TimeLongerFaster (in many systems)
Best Use CaseResidential & light commercialIndustrial & corrosive environments

Which Primer Should You Choose?

Choose Alkyd Metal Primer If:

  • Cost efficiency is a priority

  • The roof has light to moderate rust

  • The environment is not extremely humid or corrosive

  • You need an easy-to-apply, dependable primer

Choose Epoxy Metal Primer If:

  • The roof is heavily rusted or aged

  • The building is in a coastal, industrial, or chemical environment

  • You are applying high-performance coatings afterward

  • Long-term adhesion and corrosion control are essential

The Flex Rock Coatings Advantage

For professionals seeking the strongest foundation for metal roof restoration, Flex Rock Coatings offers premium-grade primers engineered for long-lasting performance.

Recommended Products

  • Alkyd Metal Primer – For metal roof maintenance, rust control & general use

  • Epoxy Primer for Metal – For maximum adhesion, corrosion resistance, and harsh environments

Each formula is designed to work seamlessly with Flex Rock Coatings’ full line of roof coatings, including acrylic, urethane, silicone, and polyaspartic systems.

Final Thoughts

Choosing the right primer is critical for extending metal roof life and preventing premature coating failure.

  • Alkyd Primer = Affordable, reliable, general-purpose

  • Epoxy Primer = High-strength, industrial-grade protection

For contractors aiming for long-term performance and minimal callbacks, epoxy is often the superior investment. However, for routine maintenance or lower-risk environments, alkyd remains a proven, budget-friendly choice.

Choosing the Right Roof Primer: EPDM, Modified Bitumen, Polyurethane

A roof coating system is only as strong as its foundation — and that foundation begins with the primer. The right roof primer enhances adhesion, extends coating lifespan, prevents peeling, and ensures long-term waterproofing.

But with multiple primer types available — EPDM Roof Primer, Modified Bitumen Roof Primer, and Polyurethane Roof Primer — contractors often ask:

“Which primer should I use for my specific roof type?”

This guide breaks down the performance, uses, application methods, and benefits of each primer to help installers choose the right product for every project.

1. Why Primers Matter in Roof Coating Systems

Primers serve as the bonding layer between the roof substrate and the coating system.

What Primers Do:

  • Improve adhesion

  • Block oils & contaminants

  • Seal porous surfaces

  • Prevent coating delamination

  • Extend system lifespan

  • Ensure manufacturer warranty compliance

Skipping the primer can lead to:
❌ Adhesion failures
❌ Blistering
❌ Peeling coatings
❌ Shortened roof life

A high-performance roof begins with a high-performance primer.

2. EPDM Roof Primer – Best for Rubber Roofing

EPDM (Ethylene Propylene Diene Monomer) rubber roofs require specialized primers because of their low surface energy and oily membrane.

Why EPDM Needs Its Own Primer

  • Natural oils in EPDM prevent coatings from sticking

  • Rubber remains flexible and expands heavily

  • A standard acrylic or urethane primer cannot bond properly

EPDM Roof Primer Features

✔ Designed for low-energy surfaces
✔ Chemically “etches” the EPDM for bonding
✔ Helps coatings adhere permanently
✔ Prevents peeling and blistering
✔ Ideal for RV roofs & commercial EPDM membranes

Recommended Uses

  • Rubber roofs on RVs

  • Commercial EPDM membrane roofs

  • Weathered EPDM restoration

  • Before applying silicone, acrylic, or urethane coatings

Works With:

  • Acrylic Roof Top Coat

  • Urethane Base Coat

  • Silicone Roof Coating

If you are coating EPDM — this primer is mandatory.

3. Modified Bitumen Roof Primer – Best for Torch Down, SBS & APP Roofs

Modified bitumen (mod-bit) contains asphaltic oils that migrate to the surface.
These oils prevent coatings from bonding without the correct primer.

Why Modified Bitumen Needs a Dedicated Primer

  • Surface oils cause coating slippage

  • Granules, dust & aging reduce adhesion

  • Asphalt softens under heat and requires stabilization

Modified Bitumen Roof Primer Features

✔ Blocks oils from bleeding into the coating
✔ Penetrates the granulated texture
✔ Excellent for SBS & APP roofs
✔ Improves coating film uniformity
✔ Helps seal small cracks and porous areas

Recommended Uses

  • Granulated mod-bit roofs

  • Smooth mod-bit systems

  • Torch-down roofing

  • Heat-exposed areas

  • Before acrylic or urethane top coats

Works Well With:

  • Acrylic Roof Base Coat

  • Acrylic Roof Flashing

  • Urethane Roof Flashing

  • Polyurethane or Silicone roof systems

Use this primer for any asphalt-based or mod-bit roofing system.

4. Polyurethane Roof Primer – Best for Metal, Concrete, Wood & Multi-Surface Applications

Polyurethane Roof Primer is the most versatile primer option — ideal for industrial, commercial, and multi-substrate projects.

What Makes Polyurethane Primer Stand Out

  • Extremely high adhesion strength

  • Works on difficult and porous surfaces

  • Moisture-resistant

  • Fast drying

  • Handles building movement

  • Creates a strong foundation for urethane and hybrid systems

Polyurethane Roof Primer Features

✔ Bonds to metal, wood, concrete & aged coatings
✔ Adds corrosion resistance on metal
✔ Excellent on rough or chalky surfaces
✔ Promotes adhesion for urethane base coats
✔ Durable under ponding water conditions

Recommended Uses

  • Metal roofs

  • Concrete rooftops or parapet walls

  • Aged coatings (urethane, acrylic, aluminum)

  • Spray foam roofs

  • Wood decking under waterproof systems

Best Paired With:

  • Urethane Roof Base Coat

  • Urethane Roof Top Coat

  • Urethane Roof Flashing

If you need strong adhesion across multiple materials, polyurethane primer is the best choice.

5. Comparison Chart: EPDM vs Modified Bitumen vs Polyurethane Primers

FeatureEPDM PrimerModified Bitumen PrimerPolyurethane Primer
Ideal ForEPDM RubberTorch Down, SBS, APPMetal, Concrete, Wood
Adhesion StrengthVery HighHighVery High
Oil BlockingModerateExcellentModerate
Surface TypeLow EnergyAsphaltMulti-Surface
FlexibilityVery HighHighHigh
Common UsesRV Roofs, Rubber MembranesGranulated Mod-Bit, Asphaltic RoofsIndustrial & Commercial Mixed Surfaces
Coating CompatibilityAcrylic, Silicone, UrethaneAcrylic, UrethaneUrethane, Acrylic

6. How to Choose the Right Primer (Quick Guide)

✔ If the roof is EPDM or RV rubberChoose EPDM Roof Primer
✔ If the roof is asphaltic / torch-down / granulatedChoose Modified Bitumen Roof Primer
✔ If the roof is metal, concrete, wood, or mixed substratesChoose Polyurethane Roof Primer

The wrong primer can compromise the entire system — the correct one ensures the coating bonds flawlessly.

7. Professional Installer Tips

✔ Clean the surface thoroughly

Dust, oils, and chalking reduce primer adhesion.

✔ Follow manufacturer spread rates

Primers must be applied at the right mil thickness.

✔ Allow full drying before coating

Most primers require 1–3 hours of cure time.

✔ Use reinforcement with urethane flashing

Especially around penetrations and seams.

✔ Don’t skip primer on problem substrates

Better adhesion = fewer callbacks.

8. Final Summary

Choosing the right roof primer is crucial to the success of any coating system.
Each primer offers unique advantages:

  • EPDM Roof Primer → For rubber roofs needing strong chemical bonding

  • Modified Bitumen Roof Primer → For asphalt roofs with oil migration

  • Polyurethane Roof Primer → For metal, concrete, wood, and multi-surface roofs

When matched correctly, primers significantly improve coating performance, durability, adhesion, and long-term waterproofing.

This guide ensures that roofing professionals and building owners select the right foundation for a long-lasting, high-performance roof coating system.

Acrylic vs Urethane Roof Coatings – Which System Performs Better?

When it comes to restoring and protecting commercial or residential roofs, two coating systems dominate the industry: Acrylic Roof Coatings and Urethane Roof Coatings. Both offer exceptional waterproofing, UV protection, and cost-effective roofing solutions—but each system performs differently depending on roof type, climate, and project requirements.

This comprehensive guide compares Acrylic vs Urethane to help contractors, facility managers, and building owners choose the system that delivers the best long-term performance.

1. What Are Acrylic Roof Coatings?

Acrylic coatings are water-based, highly reflective, and cost-effective roofing solutions widely used on flat and low-slope roofs.

Key Features of Acrylic Coatings

  • Excellent UV resistance

  • High reflectivity for energy savings

  • Easy to apply by brush, roller, or spray

  • Environmentally friendly (low VOC)

  • Ideal for warm and moderate climates

Most Common Acrylic Products

  • Acrylic Roof Flashing

  • Acrylic Roof Top Coat

  • Acrylic Roof Base Coat

Acrylics are known for their white, solar-reflective finish, making them popular for energy-efficient roofing.

2. What Are Urethane Roof Coatings?

Urethane (polyurethane) roof coatings are solvent-based, extremely durable, and designed to handle harsh environmental conditions and roof movement.

Key Features of Urethane Coatings

  • Superior adhesion

  • High elasticity

  • Impact & abrasion resistance

  • Solvent, chemical, and ponding-water resistance

  • Long service life

Most Common Urethane Products

  • Urethane Roof Flashing

  • Urethane Base Coat

  • Urethane Roof Top Coat

  • Urethane Base Coat Gray

Urethane systems excel in demanding industrial environments.

3. Acrylic vs Urethane: Performance Comparison

Below is a detailed, installer-focused comparison.


A. Durability & Longevity

Urethane

✔ Extremely durable
✔ Excellent chemical, impact, and abrasion resistance
✔ Handles expansion, foot traffic & heavy movement
✔ Best for long-term industrial use

Acrylic

✔ Good durability but less impact-resistant
✔ Can crack on high-movement roofs
✔ More suitable for mild climates
✔ Requires thicker application for longevity

Winner: Urethane


B. Ponding Water Resistance

Urethane

✔ Highly resistant to ponding water
✔ Maintains adhesion and flexibility
✔ Ideal for flat roofs or poor drainage systems

Acrylic

❌ Not recommended for ponding water
❌ Water can degrade acrylic over time
❌ May blister or delaminate

Winner: Urethane


C. UV Protection & Reflectivity

Acrylic

✔ Exceptional UV resistance
✔ High reflectivity (cool roof performance)
✔ Reduces surface temperatures
✔ Great for sun-intense climates

Urethane

✔ Good UV stability
✔ Often requires a top coat for maximum UV protection

Winner: Acrylic


D. Installation & Application

Acrylic

✔ Easier to apply
✔ Soap-and-water cleanup
✔ Lower odor
✔ Faster drying time

Urethane

✔ Requires more skill
✔ Stronger odor due to solvents
✔ Slightly slower cure time

Winner: Acrylic (for ease of installation)


E. Flexibility and Movement

Urethane

✔ Highest elasticity
✔ Excellent crack bridging
✔ Suitable for metal, seams, and transitions
✔ Performs extremely well with reinforcement fabrics

Acrylic

➖ Good flexibility
❌ Not suitable for constant movement areas

Winner: Urethane


F. Cost & Budget Considerations

Acrylic

✔ More affordable
✔ Better for budget or large-area projects
✔ Ideal for cool roof installations

Urethane

✔ More expensive
✔ But longer lifespan means lower lifecycle cost

Winner: Acrylic (initial cost)
Winner: Urethane (lifecycle cost)

4. Best Uses for Acrylic & Urethane Systems

Where Acrylic Performs Best

  • Warm and dry climates

  • Large roof areas needing reflectivity

  • Energy-saving projects

  • Budget-sensitive jobs

  • Sloped or well-draining roofs

  • Acrylic Roof Flashing, Base Coat & Top Coat systems


Where Urethane Performs Best

  • Flat roofs with ponding water

  • Industrial buildings

  • Metal roofs

  • High-traffic or high-movement surfaces

  • Chemical-prone environments

  • Roofs exposed to severe weather

  • Urethane Roof Flashing, Urethane Base Coat & Top Coat systems

5. Comparison Table (Quick Summary)

FeatureAcrylic CoatingsUrethane Coatings
Durability⭐⭐⭐⭐⭐⭐⭐⭐
UV Resistance⭐⭐⭐⭐⭐⭐⭐⭐⭐
Ponding Water Resistance⭐⭐⭐⭐⭐⭐⭐
Flexibility⭐⭐⭐⭐⭐⭐⭐⭐
Application Ease⭐⭐⭐⭐⭐⭐⭐⭐
Foot TrafficModerateExcellent
CostLowMedium–High
Ideal UsesReflective, large roofsIndustrial, high-stress roofs

6. Which System Performs Better Overall?

For reflectivity, affordability, and ease of installation → Acrylic wins.
For durability, movement, ponding water defense, and long-term protection → Urethane wins.

Most roofing contractors choose:

  • Acrylic systems for warm, dry climates where reflectivity is the priority

  • Urethane systems for industrial durability, flexibility, and waterproofing

In many cases, the best-performing system is a hybrid system:

Urethane Base Coat for durability
Acrylic Top Coat for UV protection & reflectivity

This is a popular contractor-approved combination.

7. Final Recommendation

If your project involves:

  • High movement

  • Heavy foot traffic

  • Ponding water

  • Industrial exposure

  • Harsh weather

👉 Choose Urethane (best performance).

If your project involves:

  • Budget considerations

  • Hot weather

  • Energy efficiency goals

  • Large flat roofs with good drainage

👉 Choose Acrylic (best reflectivity + cost).

Both systems, when installed correctly, provide long-lasting roof protection.
The key is selecting the correct coating based on the roof’s environment and performance requirements.

Urethane Roof Flashing – Complete Guide for Professional Installers

Urethane roof flashing has become one of the most reliable solutions for sealing roof penetrations, seams, fasteners, and vulnerable connection points. Professional roofing contractors prefer urethane-based systems because of their flexibility, adhesion strength, and long-term weather resistance—especially on commercial, industrial, and metal roofs.

This guide covers everything installers need to know, including product selection, application techniques, surface preparation, drying times, and common mistakes to avoid.

1. What Is Urethane Roof Flashing?

Urethane roof flashing is a high-performance, elastomeric coating designed to seal joints and transitions where water intrusion commonly occurs.

Key Benefits

  • Exceptional adhesion to multiple substrates

  • Superior flexibility for expansion/contraction

  • UV and weather resistant

  • Compatible with urethane base coats & top coats

  • Ideal for long-term waterproofing

Urethane flashing is commonly used before applying:

  • Urethane Base Coat

  • Urethane Roof Top Coat

  • Reinforced fabric systems

2. Where to Use Urethane Flashing (Installer Checklist)

✔ HVAC curbs
✔ Vents & pipes
✔ Roof edges and terminations
✔ Seams on metal roofs
✔ Parapet walls
✔ Expansion joints
✔ Fasteners and screw heads
✔ Transitions between different roofing materials

If an area is exposed, penetrated, or vulnerable — urethane flashing is required.

3. Compatible Roofing Substrates

Urethane roof flashing works on:

  • EPDM rubber

  • TPO & PVC (with primer)

  • Metal roofing

  • Modified Bitumen

  • Concrete

  • Wood

  • Spray foam

  • Most coated surfaces (after surface prep)

For best results, many installers pair it with a Urethane Base Coat Gray prior to the full coating system.

4. Tools & Materials Required

To ensure clean and professional installation, installers should have:

Materials

  • Urethane Roof Flashing

  • Urethane Base Coat

  • Urethane Roof Top Coat

  • Reinforcement fabric (optional but recommended)

Tools

  • 3”–6” brush

  • Trowel or putty knife

  • Utility scissors (for fabric)

  • Mixing paddle

  • Spiked shoes (if applying coatings on large areas)

5. Professional Surface Preparation

Proper prep ensures long-term adhesion and prevents premature failure.

Step-by-Step Prep

  1. Clean the surface
    Remove dust, oils, rust, peeling coatings, or debris.

  2. Dry the area
    Urethane products should not be applied to wet surfaces.

  3. Prime (if needed)
    For EPDM, TPO, and metal roofs, installers may use:

    • EPDM Roof Primer

    • Modified Bitumen Primer

    • Polyurethane Roof Primer

  4. Repair damaged areas
    Fill cracks, reinforce seams, and tighten loose fasteners.

Good prep = stronger adhesion = longer warranty performance.

6. How to Apply Urethane Roof Flashing (Pro Method)

Step 1: Apply First Layer

Use a brush or trowel to apply a thick, even coat (25–40 mils wet film thickness).

Step 2: Embed Fabric (Recommended)

Place reinforcement fabric into the wet urethane and smooth it out.

Step 3: Apply Second Layer

Apply another layer of urethane flashing over the fabric to fully encapsulate it.

Step 4: Allow Drying

Cure times vary with temperature:

  • Touch-dry: 1–2 hours

  • Recoat time: 6–8 hours

  • Full cure: 24–48 hours

Avoid moisture exposure during curing.

7. Best Practices for Installers

✔ Apply during mild weather

Extreme cold/humidity slows curing.

✔ Use fabric on all high-movement areas

It provides additional tensile strength.

✔ Maintain proper thickness

Underapplication reduces lifespan.

✔ Seal all penetrations thoroughly

Water typically enters around details—not large surfaces.

✔ Follow with a base coat & top coat

For complete system protection and warranty compliance.

8. Common Installer Mistakes (and How to Avoid Them)

❌ Applying over dirty surfaces

Fix: Clean thoroughly to avoid adhesion failure.

❌ Skipping primer on EPDM/TPO

Fix: Always use the correct primer.

❌ Applying too thin

Fix: Maintain required mil thickness.

❌ Not embedding fabric

Fix: Use fabric on seams, edges, and cracks.

❌ Applying in rain/humidity

Fix: Follow weather guidelines.

9. Why Urethane Flashing Outperforms Acrylic or Silicone

FeatureUrethaneAcrylicSilicone
Flexibility⭐⭐⭐⭐⭐⭐⭐⭐⭐⭐⭐⭐
Adhesion⭐⭐⭐⭐⭐⭐⭐⭐⭐⭐⭐⭐
Abrasion Resistance⭐⭐⭐⭐⭐⭐⭐⭐⭐⭐
Chemical Resistance⭐⭐⭐⭐⭐⭐⭐⭐⭐⭐⭐
Crack BridgingExcellentModerateHigh

Urethane is the best choice for professional installers working on high-movement, high-stress roof details.

10. Final Summary

Urethane roof flashing is a premium, long-lasting waterproofing solution trusted by professional installers for sealing roof penetrations, seams, and transitions. When combined with a full urethane roofing system (base coat + top coat), it delivers superior performance and durability.

Using proper prep, fabric reinforcement, and correct application thickness ensures:

✔ Long-term waterproofing
✔ Better adhesion
✔ Increased lifespan
✔ Fewer callbacks
✔ Warranty compliance

This guide equips installers with everything needed to apply urethane flashing professionally and consistently.

Product has been added to your cart